Vanilla Bean Cream Soda

Vanilla Bean Cream Soda  | Yea Yea PuebloRecord heat swept through our area earlier this week. You’d think that since I’m from Bakersfield, a city with some of the hottest summer days in the nation, I could swing the heat, no problem…this is not the case.

You see, in Bakersfield, CA we had this wonderful invention called the air conditioner. It’s a foreign concept up here in Washington state, mainly because they’d only be in use for a few days every summer. Our house is a two story, equipped with zero cool-air-emitting contraptions, making the days a little toasty when the temperatures surpass 80 like they did on Monday. Whoa, 80 degrees? Yeah, I know. Sweltering.

Vanilla Bean Cream Soda  | Yea Yea Pueblo

I’m probably the only person in Washington wishing for the rain to return. Fortunately, the temps dropped back down into the 70s, and rain is on the horizon (which reminds me, I’m pretty sure I’m going to love the cold weather in Alaska!).

This pop came to my attention when searching for a vanilla bean based beverage to take the edge off these warm summer days sans A/C. The original recipe, from Cheeky Kitchen, calls for granulated white sugar. I chose to use Agave nectar to sweeten it instead, since it’s a low glycemic sweetener. It absorbs into the body slower, preventing spikes in blood sugar. I kicked my pregnancy-influenced sugar habit recently, and didn’t want to completely relapse.

Vanilla Bean Cream Soda  | Yea Yea Pueblo
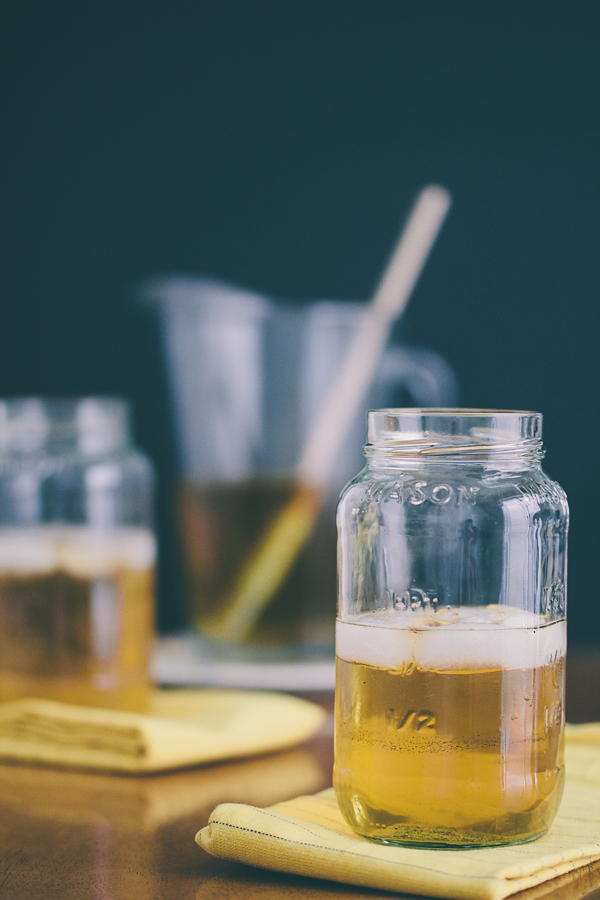
Vanilla Bean Cream Soda Recipe

Ingredients:

1 1/3 cup Organic Blue Agave Nectar

1 Vanilla Bean – caviar stripped

1 tablespoon Vanilla Extract

1/4 teaspoon Almond Extract

1 QT Sparkling Water – Chilled

Directions:

Slice vanilla bean lengthwise, use paring knife or spoon to scrape vanilla bean caviar into a large pitcher.

Add Agave nectar, and extracts to the vanilla bean caviar and mix thoroughly.

Add sparkling soda slowly.

Notes:

The caviar will separate from the mixture and float to the top. If you plan on serving immediately, I recommend topping the pitcher with copious amounts of ice. This re-integrates the caviar into the drink. Or, hold a spatula over the spout while pouring over ice in individual glasses to limit the amount of caviar going into each glass. This seemed to work for me.

Shelf life is about a 24 hours since the carbonation tends to disappear slightly with each pour.

Bonus!: to enhance your porch-sitting, spike this soda with white rum. It’s insanely delicious.

Vanilla Bean Cream Soda  | Yea Yea Pueblo

A Picnic-Worthy Fruit Salad

A Picnic Worthy Fruit Salad | Yea Yea Pueblo

Here I am, five weeks postpartum and I’m going through some serious sugar withdrawals. They’re bad. The irritability and cookie cravings are out of control, I tell you

Pregnancy was super fun because I enjoyed a faster metabolism and eating under the guise of  ‘hormones’. I gained a sturdy 29 lbs over the 41+ weeks I was pregnant, and it’s unfortunately not coming off as quickly as I had anticipated. I even started exercising again, but it’s not nearly as easy as I remember it (especially after a cesarean!). Isaac and I were up to 10 miles on our long-distance runs when I found out I was pregnant. Now I can hardly complete one full mile. It’s discouraging.

Knowing what had to be done (as it never should have begun), I decided to kick my cookie, ice cream and candy habit. At least until the next pregnancy, wink-wink.

A Picnic Worthy Fruit Salad | Yea Yea PuebloA Picnic Worthy Fruit Salad | Yea Yea Pueblo

I remember trying to kick my life-long sugar habit in college, and I did it with this fruit salad. It’s become my signature bring-along over the last 8 years since it truly never disappoints. Preparing this fruit salad brings back fond memories of music festivals, barbecues, hiking trips, and potlucks. Each event was the perfect occasion to bring along this fruit salad.

It’s incredibly simple, and healthy, and requires basic ingredients you probably already have in your kitchen.

I’ll be chowing down on this until I can see my sugar cravings in the rear-view mirror.

A Picnic Worthy Fruit Salad | Yea Yea Pueblo

My Picnic-Worthy Fruit Salad “Recipe”

Ingredients

1 Large Honey Crisp apple, or 3 small ones. This should total 2-3 cups.

1-2 Bananas, depending on size. I prefer to buy the longer ones.

1 single-serve container of Greek Vanilla Yogurt, approximately 5 ounces.

2/3 cup Granola, I always use Kashi’s Go Lean Crunch.

Directions

1. Chop apples into bite size pieces.

2. Slice banana into bite size pieces.

3. In a large mixing bowl, combine apples, bananas, and yogurt. Mix until coated evenly.

4. Sprinkle granola mixture over the top of the salad, and serve.

A Picnic Worthy Fruit Salad | Yea Yea Pueblo

Notes

-Keep the granola separate until you’re ready to serve, if you mix it in prematurely, and the fruit salad sits for a period of time, the granola gets soggy.

-The ratio of apples to bananas should be roughly 1:1.

-I’ve always used vanilla yogurt, feel free to try out Strawberry, Orange, or another fruit-flavored yogurt instead.

-Kashi Go Lean Crunch is a staple around my house, if you have another granola based cereal, or snack at hand, feel free to try it out instead.

-Tart Apples tend to do this dish an injustice, I highly recommend sticking with Honey Crisp or Red Delicious.

-You can also throw in some grapes, or strawberries, but just like the childhood song, I like to eat apples & bananas.

A Picnic-Worthy Fruit Salad | Yea Yea Pueblo

A Springtime Strawberry Galette

Cooking, baking, and really all kitchen activities have become a bit more difficult to take on since bringing Margot home. In fact, as I’m writing this post, she’s napping cozily on my chest, supported by my nifty Boba wrap. Given her expected level of neediness in these early months, taking on difficult recipes is just not really an option — at least until I become more efficient with juggling chores and baby care.

A Springtime Strawberry galette | Yea Yea Pueblo

Without considering this reality, Isaac and I over-committed to fresh produce in bulk from Costco, once again, and bought 5 pounds of strawberries. We’ve done a great job of munching on them with yogurt, but I needed to put a big dent in our supply. Sooo, I took on a simple strawberry galette this afternoon.

A Springtime Strawberry Galette | Yea Yea Pueblo

I love galettes. Once I learned how to construct them, they quickly became a favorite meal around here. I typically throw roasted vegetables and cheese in them to make a savory dinner, which is contrary to their reputation as ‘sweet’, but this time I prepped one that was true to form.

A Springtime Strawberry Galette | Yea Yea Pueblo

I try to keep store-bought pie crusts around because I really hate having to make my own from scratch; even when I had more time on my hands, I didn’t appreciate the extended process. I have no qualms about calling myself out as lazy on this. If you try out this recipe and want to try a crust from scratch, try this recipe from the Food Network.

A Springtime Strawberry Galette | Yea Yea Pueblo

Now for the recipe:

Ingredients:

2-3 cups fresh strawberries, depending on size

1 tablespoon flour

1/4 cup sugar

1/8 cup of sliced unsalted almonds, or unsalted chopped nuts of your choice — I used the pre-sliced almonds from the produce section that are made for salads

1/2 teaspoon cinnamon to dust

1 store bought pie crust

Ice cream or whipped cream to top

A Springtime Strawberry Galette | Yea Yea Pueblo

Directions:

1. Preheat oven to 400 degrees F. Rinse strawberries, hull and slice thinly.

2. Gently toss the strawberries in the flour and sugar.

3. Line a cookie sheet with parchment paper and unroll pie crust on center of parchment paper.

4. Sprinkle 3/4 of the almonds directly onto pie crust, leaving a 2 inch margin clear around the perimeter of the pie crust.

5. Thinly layer strawberry mixture onto pie crust, again leaving a 2 inch margin clear around the perimeter of the pie crust.

6. Fold edges of pie crust up around the edge of the strawberries, pinching folds of the crust to itself as you rotate the galette. See the image below for reference. This step took some practice for me to get the hang of.

7. Lightly sprinkle cinnamon over the entire galette, then add remaining almonds to garnish.

8. Bake galette for 20-25 minutes, until crust is lightly browned and crispy.

9. Serve warm, topped with ice cream or whipped cream. Try Cookies and Cream ice cream: paired with the strawberries, it’s divine!

A Springtime Strawberry Galette | Yea Yea Pueblo

If you do decide to whip this up, throw caution to the wind and have it for lunch. I just did, and it’s making my afternoon all the more awesome.